 how-to
7 Steps to Arrange Three-Dimensional Wall Art Well
Table of Contents
- Why Three-Dimensional Wall Art Needs Different Planning
- Choosing the Right Wall Space and Sightlines
- How to Arrange Three-Dimensional Wall Art for Living Room Walls
- How to Arrange Wall Art in Bedroom Spaces
- Balancing Weight, Wall Integrity and Hanging Hardware
- Lighting Relief Art and Casting Shadow Play
- Using a Placement App to Test Layouts Before Hanging
- Creating a 3D Wall Art DIY Arrangement at Home
- Planning Your Next Wall Layout With Confidence
- Frequently Asked Questions
Last Updated: November 11, 2026
Why Three-Dimensional Wall Art Needs Different Planning
Three-dimensional wall art does not sit flat like a framed print. It projects from the wall, throws shadows, and changes look as the light moves across the room during the day. Because of this, you plan its placement differently from ordinary pictures. Knowing how to arrange three-dimensional wall art well starts with accepting that depth changes everything.
Flat art can usually be hung by eye at a standard height. Dimensional pieces need more thought:
- Depth: Measure how far each piece projects before choosing its spot.
- Shadow: Light from a window or lamp will carve shapes into the surface.
- Weight: Heavier pieces need stronger hardware and solid wall anchors.
- Viewing angle: A piece seen straight on may look different from the side.
Choosing the Right Wall Space and Sightlines
Pick a wall that gives the piece room to breathe. A sculpture crowded by doorframes or a ceiling line loses its shape. Look for open wall space with few competing objects.
Next, check your sightlines. Stand in the doorway and sit on the sofa. Note what you see first when you walk into the room. The best spot is usually where the piece catches the eye without blocking a path.
Here is a quick way to test a spot:
- Tape a sheet of paper to the wall at the planned size.
- Stand where you spend the most time.
- Move around the room and watch the paper from each seat.
- Adjust until the spot feels natural from every key angle.
How to Arrange Three-Dimensional Wall Art for Living Room Walls
Living rooms offer the most room for bold pieces. Start by deciding on one focal wall. Put your largest sculpture there, then build around it with smaller accents.
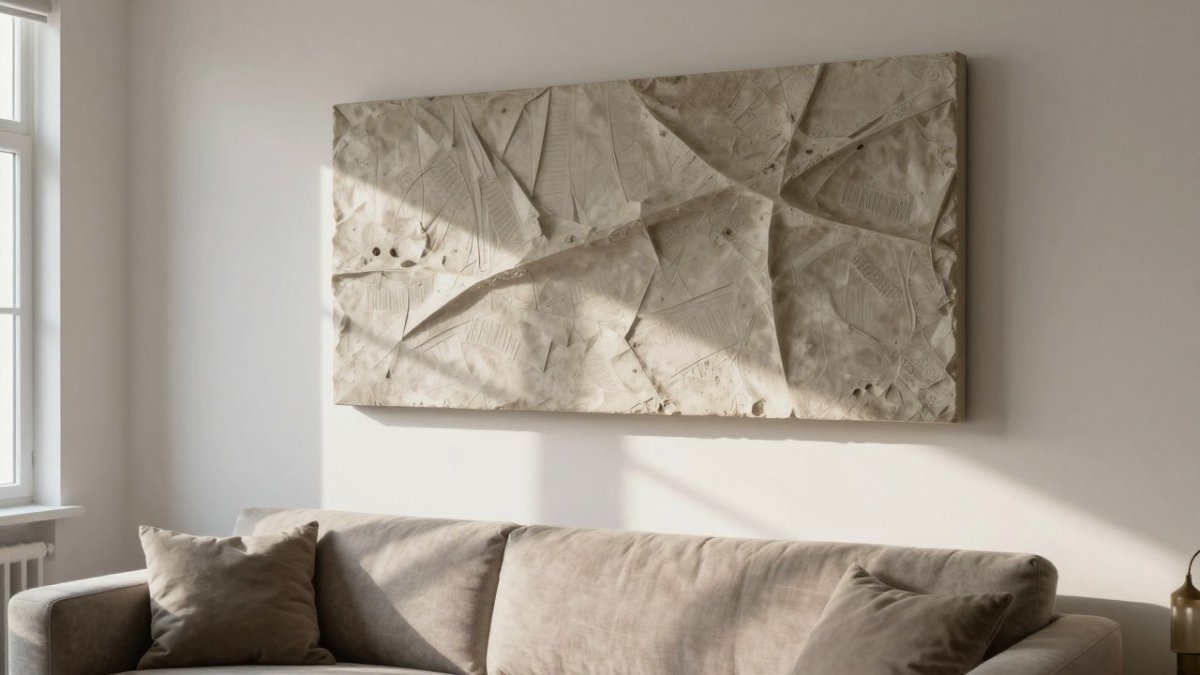
Many people find that odd numbers look more relaxed than even ones. Three smaller resin pieces grouped in a loose triangle often work better than two evenly spaced ones. Keep the spacing between pieces roughly equal, and let the group sit slightly off center for a more lived-in feel.
Placing Pieces Above a Sofa or Console
A piece above a sofa should feel tied to the furniture below it. Leave a comfortable gap between the top of the sofa back and the bottom of the artwork, and center the piece on the sofa rather than the wall if the two are not the same width.
Above a console table, a slim sculpture can sit a little lower, visually linked to the table by its width or height.
How to Arrange Wall Art in Bedroom Spaces
Bedrooms call for a softer approach. Place a three-dimensional piece above the headboard or on a side wall where you see it while lying down. Avoid heavy, sharp shapes near the bed, since they can feel imposing at night.
Lighting plays a big role here. A small wall lamp angled across the piece will bring out its texture without glare in your eyes.
Balancing Weight, Wall Integrity and Hanging Hardware
Heavy three-dimensional pieces demand more than a nail and a hope. The first step is to know the weight of the piece, which is typically listed on the product page or packaging. Once you have that number, choose hardware rated for at least that weight, and preferably more. A common pattern among installers is to select a fastener with a safety margin of roughly double the piece's weight, especially for items that project far from the wall and create leverage.
The wall itself matters as much as the hardware. Drywall alone has very little pull-out strength. A plain nail or a small screw in drywall can hold a lightweight resin accent, but it will fail under a heavy metal or wood sculpture. For anything substantial, fasten into a wood stud whenever possible. Studs are typically spaced 16 or 24 inches on center, and a stud finder is the most reliable way to locate them. If the studs do not line up with where you want the piece, use a heavy-duty wall anchor designed for drywall, such as a toggle bolt or a molly bolt. These spread the load behind the wall and are rated for specific weights, so check the package.
Renters face a separate challenge: keeping the wall intact. Adhesive strips and hooks work well for lightweight pieces, but they are not intended for heavy sculptures. For heavier items, a removable track system or a low-impact mount that uses small nails in a vertical line can distribute weight and minimize damage. Always test a small area first, and follow the manufacturer's removal instructions to avoid tearing the drywall paper.
Lighting Relief Art and Casting Shadow Play
Light is what makes three-dimensional wall art come alive. A piece that looks flat in diffuse daylight can reveal deep contours and texture when lit from the side. The key is to treat lighting as part of the arrangement, not an afterthought.
Start by observing how natural light moves across the wall during the day. A window to the side of the piece will create shifting shadows that change from morning to evening. If the piece is on a wall that receives direct sun, be mindful of glare and heat, which can damage some materials over time. Sheer curtains or UV-filtering window film can help.
For artificial light, the goal is to graze the surface rather than flood it. A track light or a wall sconce positioned to one side and slightly above the piece will cast shadows that emphasize its depth. The angle matters: a light placed at roughly 30 to 45 degrees from the wall will create longer shadows than one aimed straight on. Adjustable spotlights let you fine-tune the angle without moving the fixture.
Soft, diffused light works well for smooth resin pieces with gentle curves, while a more focused beam can bring out the texture of rough or carved surfaces. Try a few placements before committing: a floor lamp moved to different spots, or a clamp light temporarily attached to a shelf, can help you preview the effect. Pay attention to the color temperature of the bulb as well. Warm white (around 2700K to 3000K) tends to feel cozy and flattering in living spaces, while cooler white (3500K to 4000K) can make details pop in a more neutral way.
Watch out: placing a light too close to the artwork can create hot spots and harsh shadows that distort the piece. Keep fixtures at least a foot or two away, and avoid aiming them directly at the surface from the front, which flattens the very depth you want to show.
Using a Placement App to Test Layouts Before Hanging
Many homeowners find that a placement app saves time and wall holes. These tools let you upload a photo of your room and drop a digital version of each piece onto the wall. You can adjust size and position before you pick up a drill.
Use the app to compare two or three layouts side by side. Print the final version or save a screenshot to guide you on hanging day.
Creating a 3D Wall Art DIY Arrangement at Home
A do-it-yourself layout is easier than it sounds. Start by cutting paper templates to the exact footprint of each piece. Tape them to the wall, step back, and rearrange until the group feels balanced.
Once you are happy, measure from the floor or ceiling and mark each hanging point with a pencil. Then install the hardware and hang the pieces. Step back and check the group one last time before you finish.
Planning Your Next Wall Layout With Confidence
Arranging three-dimensional wall art well comes down to planning for depth, light and weight. Take your time with sightlines and test your layout before hanging anything. When you are ready to find the right piece for your space, explore the abstract sculptures and resin accents at Your Decor Essentials.
Shop Now
Ready to find your next statement piece? Your Decor Essentials offers curated sculptures, resin accents and functional lighting designed to make your walls feel personal. Browse the collection and find the piece that fits your space.
Frequently Asked Questions
How do you arrange three-dimensional wall art?
Start by choosing a focal wall and measuring its usable area. Lay out paper templates or the actual pieces on the floor first, then move them until the visual weight feels balanced. Group pieces in odd numbers where possible, keep a consistent gap between them, and check sightlines from the main seating position before anything goes into the wall. Shadows from relief pieces change with the light, so test the arrangement at the time of day you use the room most.
How high should three-dimensional wall art hang?
A common starting point is to center the arrangement at eye level, roughly 57 to 60 inches from the floor to the center of the group. Above a sofa, leave about 6 to 10 inches between the top of the seating and the bottom of the art so the piece relates to the furniture without crowding it. Adjust for ceiling height and for any mantel or console below the wall.
How do you hang heavy three-dimensional wall art safely?
Check the weight rating on the hardware and the wall type before mounting. Use wall anchors rated above the piece's weight, and locate studs where possible. For heavier pieces, distribute the load across two or more anchor points and consider a French cleat or a cable suspension system. Do not rely on adhesive strips for dimensional pieces with significant projection.
How do you arrange wall art in a bedroom?
In a bedroom, center larger pieces above the headboard or at the head of the bed, with the group roughly one-half to two-thirds the width of the bed. Keep the arrangement calm and lower in visual intensity than a living room display, since the room is for rest. Smaller pieces can flank a dresser or nightstand, aligned to a shared horizontal line.