 listicle
9 DIY Shelf Art Display Ideas for Beginners
Last Updated: October 27, 2026
Quick Summary
A DIY shelf art display is a wall-mounted or freestanding shelf built to hold framed art, prints, and small objects, and the easiest beginner project is a DIY picture ledge made from three boards, wood glue, and screws. Mount it once into wall studs and you can rotate prints without new nail holes.
- A DIY picture ledge takes 1 to 2 hours and suits rotating prints and photos.
- Concealed-bracket floating shelves take 2 to 3 hours and demand accurate stud placement.
- A 1-inch pine shelf on two 1/2-inch dowels into studs typically holds 20 to 30 pounds.
- Plastic expansion anchors in drywall typically hold 10 to 25 pounds each.
- Group shelf items in odd numbers and leave at least one empty stretch per shelf.
Table of Contents
- Why a DIY Shelf Art Display Beats Nailing Holes in Every Wall
- Quick Comparison: 9 Beginner Shelf Projects at a Glance
- 1. Build a DIY Picture Ledge for Rotating Artwork
- 2. Install DIY Floating Shelves With Concealed Brackets
- 3. Repurpose a Wooden Crate Into a Shadow Box Shelf
- 4. Turn a Shallow Shelf Into a Layered Gallery Wall
- 5. How to Display Art on Shelves Without Clutter
- 6. Picture Ledge Decor Ideas for Small Spaces and Renters
- 7. Beginner Safety: Wall Types, Weight Limits, and Tools
- 8. Materials, Budgets, and Time Estimates for Every Project
- Where Shelf Art Meets the Rest of the Room
- Frequently Asked Questions
Why a DIY Shelf Art Display Beats Nailing Holes in Every Wall
A DIY shelf art display is a wall-mounted or freestanding shelf system built to hold framed art, prints, and small objects, and it solves a problem almost every new renter and first-time homeowner runs into: you want your walls to feel finished, but you don't want a Swiss cheese wall of nail holes. Shelf styling can create a gallery look without committing to a permanent gallery wall.
The logic is simple. One shelf, mounted once, gives you a rotating display surface. Swap a print, add a small sculpture, restack the books, and the wall reads completely differently. No patching, no repainting, no landlord conversation.
Below are beginner-friendly shelf display ideas.
Quick Comparison: 9 Beginner Shelf Projects at a Glance
Not every project suits every wall or every skill level. This table is the short version: what each project is, how hard it is, and who it's really for.
| # | Project | Difficulty | Time | Best For |
|---|---|---|---|---|
| 1 | DIY picture ledge | Easy | 1-2 hours | Rotating prints and photos |
| 2 | Floating shelves, concealed brackets | Moderate | 2-3 hours | Clean, modern walls |
| 3 | Wooden crate shadow box | Easy | 1-2 hours | Depth and dimension |
| 4 | Shallow shelf gallery wall | Easy | 1 hour | Layered art walls |
| 5 | Clutter-free shelf styling | Easy | 30-45 min | Any existing shelf |
| 6 | Picture ledge for small spaces | Easy | 1 hour | Renters and tight rooms |
| 7 | Safety check and wall prep | Easy | 15-30 min | Every project |
| 8 | Budget and materials planning | Easy | 20 min | First-time builders |
The pattern is deliberate. Most beginner shelf art display ideas don't fail because the build is hard. They fail because the wall was wrong, the anchors were cheap, or the shelf was overloaded.
1. Build a DIY Picture Ledge for Rotating Artwork
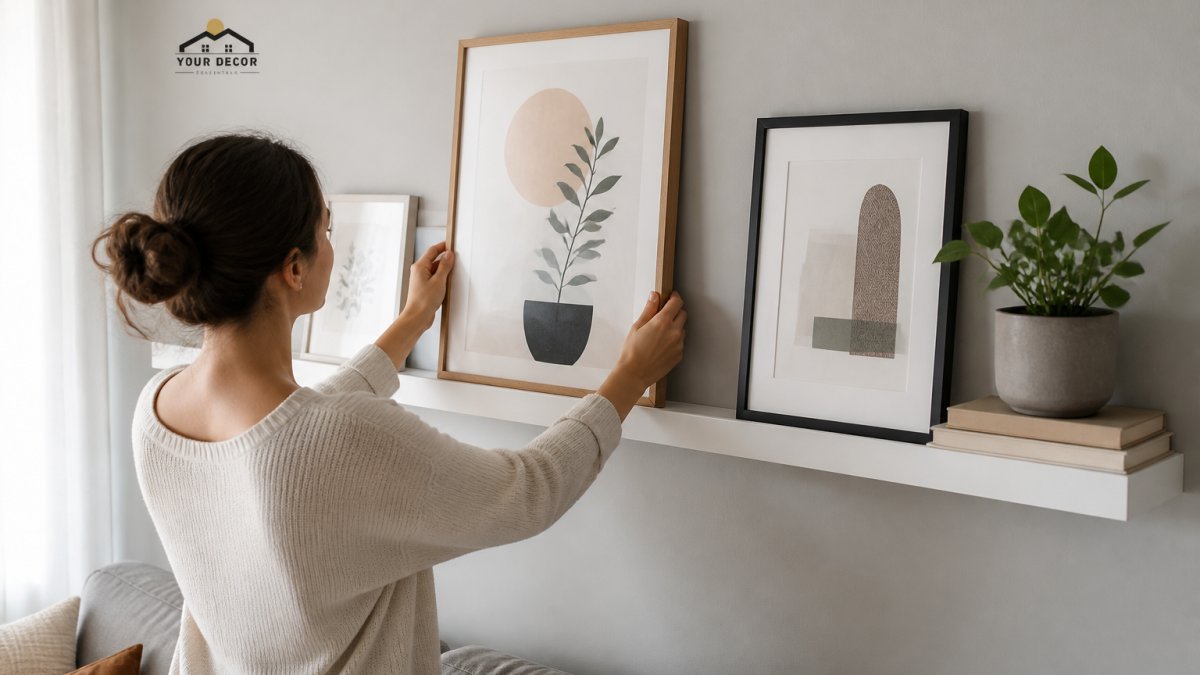
A DIY picture ledge is the single best first project on this list. It's a shallow, narrow shelf with a small front lip that lets framed art lean back against the wall instead of hanging from a hook. Three boards, some wood glue, a few screws, and you're done.
Here's how we'd build one:
- Cut a back board, a bottom board, and a narrow front lip board to the same length.
- Glue and screw the bottom board to the back board to form an L shape.
- Attach the front lip to the front edge of the bottom board.
- Sand the edges, then paint or stain.
- Locate wall studs and mount the ledge with screws driven into the back board.
Watch out: the front lip needs to be tall enough to stop a frame from sliding forward, but shallow enough that the art still leans at a natural angle. If the lip is too tall, small frames disappear behind it.
2. Install DIY Floating Shelves With Concealed Brackets
DIY floating shelves look harder than they are. The trick is that the bracket hides inside the shelf, so the board appears to grow out of the wall. That clean line is why floating shelves dominate modern shelf styling.
The honest trade-off: concealed-bracket shelves carry less weight than a bracketed shelf of the same size, and they demand accurate stud placement. Miss the stud and the shelf sags.
For anyone building from scratch, here is the most common beginner-friendly method, often called the dowel-and-hole approach:
- Cut your shelf board to length and sand the edges.
- Locate two wall studs and mark their centers with a stud finder. For a shelf up to 4 feet long, two mounting points are usually enough; longer shelves need three.
- Cut hardwood dowels (typically 1/2-inch or 5/8-inch diameter) to about 6 inches long. You need one dowel per stud per shelf.
- Drill matching holes into the back edge of the shelf board, using a drill bit the same diameter as your dowels. The holes should be deep enough to accept about half the dowel length.
- Drill pilot holes into the wall studs and drive the dowels into the studs, leaving 3 inches protruding.
- Dry-fit the shelf onto the dowels. If it slides on easily, remove it, apply wood glue to the dowels and holes, and slide it back into place.
- Wipe away squeeze-out, let the glue cure, then paint or stain.
Watch out: the holes in the shelf must be perfectly level with the dowels in the wall. Drill the shelf holes using a drill press or a guide block, and check level before the glue sets. A 1/8-inch misalignment over a 3-foot shelf is enough to make the shelf bind or sit crooked.
Weight limits matter here. A 1-inch-thick pine shelf on two 1/2-inch dowels into studs can typically hold 20 to 30 pounds when the load is distributed evenly. That is plenty for framed prints and small objects, but not for a row of hardcover books. Keep the heaviest items centered over the mounting points.
If you do not have studs where you need them, do not substitute drywall anchors for concealed-bracket shelves. The leverage on a floating shelf is higher than on a flat bracket, and anchors that hold a picture frame will not hold a shelf. Move the shelf to a stud location or choose a different project from this list.
3. Repurpose a Wooden Crate Into a Shadow Box Shelf
A wooden crate turned on its side becomes a shadow box: a shallow, boxed display with a back wall, a floor, and sides. That depth is what makes it different from a flat shelf. Small sculptures, resin accents, and objects with real dimension finally get a proper home.
The build is about as forgiving as it gets. Sand the crate, paint or stain it, then mount it to the wall through the back panel into studs. Add a small bracket underneath if the crate is deep.
This is the project where upcycling pays off. A repurposed crate shelf costs almost nothing and looks intentional in a way a store-bought box rarely does.
4. Turn a Shallow Shelf Into a Layered Gallery Wall
A shallow shelf is the quiet hero of art display. Because it projects only a little from the wall, it holds framed art and small objects without eating floor space or blocking a walkway.
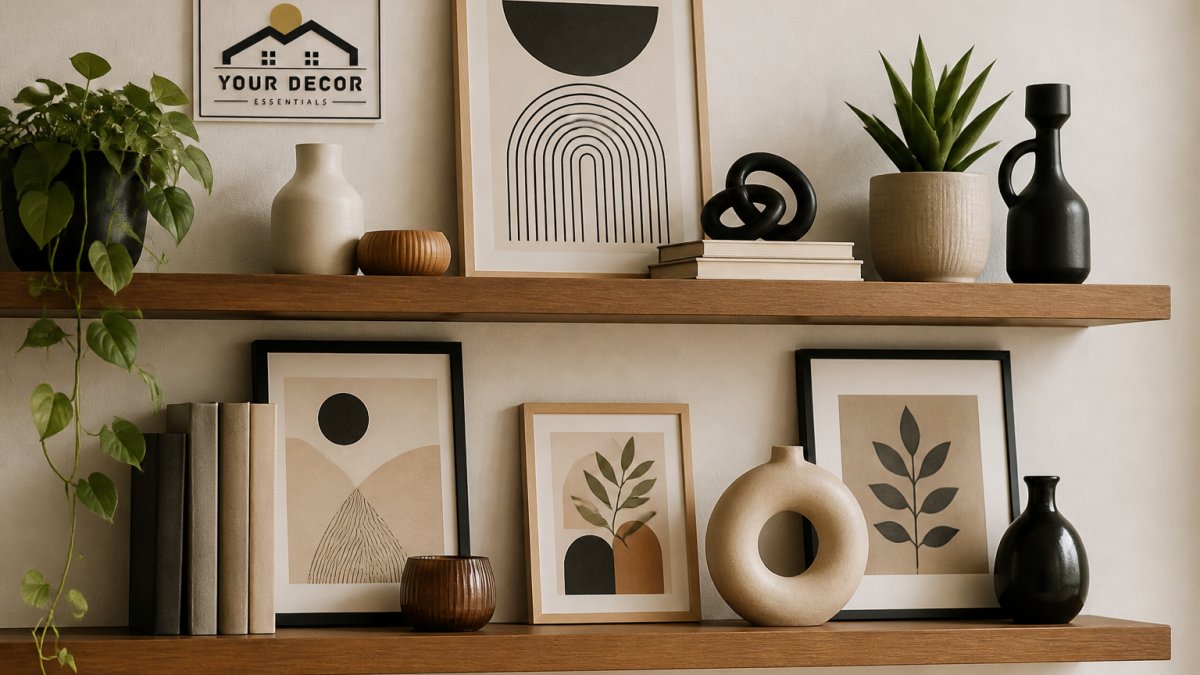
The layered approach works like this: lean larger frames at the back, stand smaller frames in front and slightly offset, then tuck a small object or plant at one end. The overlap creates depth. The eye reads it as a collection, not a row.
Two rules keep it from looking messy. First, keep the frames touching or nearly touching so they read as one unit. Second, repeat one element, a color, a frame finish, or a material, across the arrangement.
That single repeated element is what separates a styled shelf from a shelf that just has stuff on it.
5. How to Display Art on Shelves Without Clutter
Knowing how to display art on shelves without clutter comes down to one principle: every shelf needs breathing room. Crowded shelves read as storage. Spaced shelves read as design.
Try this checklist before you commit to an arrangement:
- Remove one object from every shelf and see if you miss it
- Group items in odd numbers, three or five per cluster
- Vary height: tall frame, short stack of books, small object
- Leave at least one empty stretch on every shelf
- Repeat one color or material across the whole unit
- Lean some frames instead of standing all of them upright
- Add one live plant or natural texture per shelf
The most common mistake is treating the shelf as a display case for everything you own. It isn't. A shelf art display works best when it shows fewer, better-chosen pieces.
For a deeper look at arranging small prints on tight shelves, this visual guide to styling small art prints on narrow shelves walks through layouts step by step. And if you're still deciding which pieces belong together, this guide to choosing art for shelves covers the selection side.
6. Picture Ledge Decor Ideas for Small Spaces and Renters
Picture ledge decor ideas matter most in small spaces, where every surface has to earn its place. A ledge mounted high on a wall uses vertical space that would otherwise sit empty, and it holds art without a single nail in the middle of the wall.
Renters get a specific advantage here. A ledge mounted into studs leaves a few small screw holes, not a dozen nail holes from a dozen frames. Patch and paint on move-out day and you're done.
Three renter-friendly approaches we like:
- High ledges above a desk or dresser, holding prints at eye level when seated
- Corner ledges that turn dead wall space into a display
- Freestanding ladder shelves that need no wall hardware at all
Small spaces also reward sculptural accents. A single abstract piece on a ledge does more visual work than five small frames. If you're decorating a tight room with ledges, this guide to choosing abstract sculptures for small spaces covers scale and placement.
7. Beginner Safety: Wall Types, Weight Limits, and Tools
Safety is the section most shelf tutorials skip, and it's the one that decides whether your display stays on the wall. Before you drill anything, identify what's behind the drywall.
Wall types and what they hold
- Drywall only (hollow wall): use hollow-wall anchors rated for the load. Plastic expansion anchors typically hold 10 to 25 pounds each in 1/2-inch drywall; toggle bolts hold more, often 50 to 100 pounds each, because the toggle spreads the load across a larger area behind the wall. Never rely on the screw alone in drywall.
- Wood studs: the strongest option. Drive screws directly into the stud. A single #10 wood screw into a stud can hold well over 100 pounds in pull-out, but the shelf board and bracket become the limiting factor, not the stud.
- Masonry or brick: requires a masonry bit and appropriate anchors, such as sleeve anchors or wedge anchors. Do not use drywall anchors in masonry; they will not expand properly.
- Plaster over lath: older walls that crumble easily. Predrill carefully with a bit sized for the anchor, and expect the plaster to crack if you drive a screw without a pilot hole. Toggle bolts often work better than expansion anchors in plaster because they spread the load behind the lath.
Weight limits in practice
A shelf rated for a light load should hold frames and small objects, not a row of hardcover books. Distribute weight evenly and keep the heaviest items near the mounting points. As a rule of thumb, a 24-inch shelf on two stud-mounted brackets can hold 30 to 50 pounds when the load is spread across the span; the same shelf on drywall anchors should be kept under 15 to 20 pounds total. If you are unsure, load the shelf gradually and check for sag or movement at the mounting points after a day.
Finding studs without guessing
A stud finder is the right tool, but beginners often misread it. Slide the finder slowly across the wall and mark both edges of the stud, then confirm the center with a small nail or a thin drill bit. Studs are typically spaced 16 or 24 inches on center in modern construction, but older homes can vary. Do not assume spacing; verify each stud.
The tools you actually need
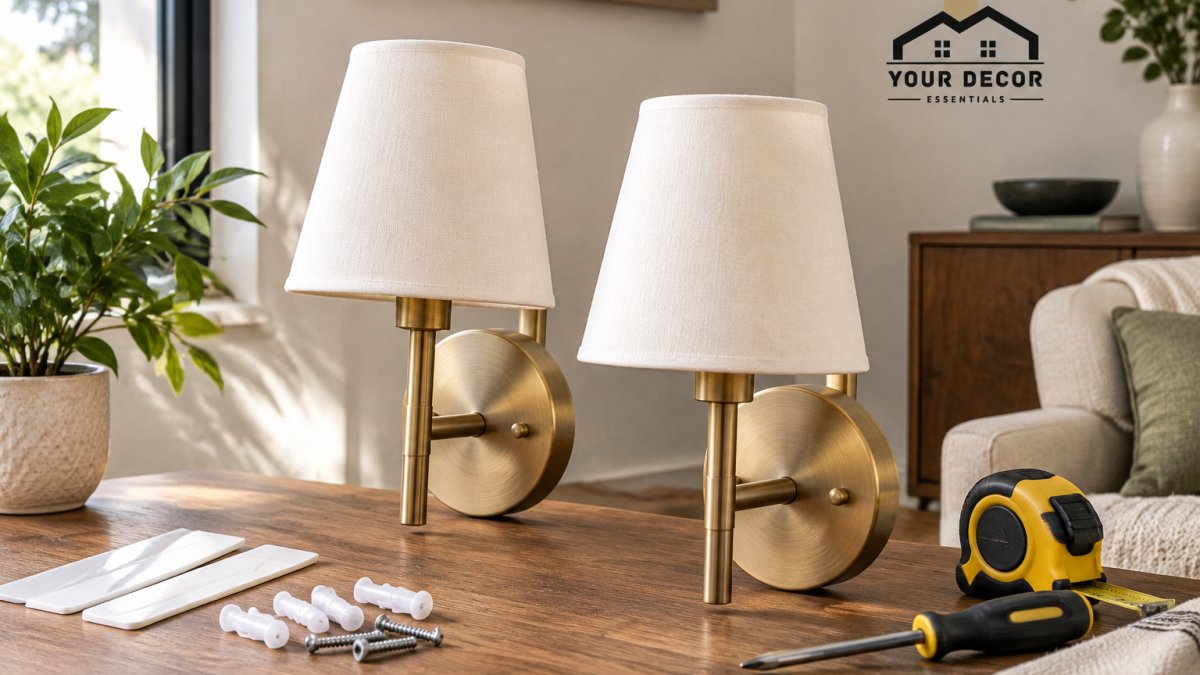
A stud finder, a level, a drill, a screwdriver, a tape measure, and a pencil. That's it for most of these projects. Add a masonry bit if you have brick or concrete, and a toggle-bolt kit if you are mounting into drywall without studs.
Watch out: mounting a shelf into drywall alone with no anchors and no studs is the number one cause of shelf failure. If you can't find a stud, use rated anchors or move the shelf. And never hang a shelf over a bed, a crib, or a seating area without mounting into studs; a shelf that pulls out of drywall can fall with enough force to cause injury.
8. Materials, Budgets, and Time Estimates for Every Project
Planning materials up front is what separates a finished project from a half-built shelf sitting in a garage. Here's the honest breakdown.
| Project | Core Materials | Time | Skill Level |
|---|---|---|---|
| Picture ledge | 3 boards, wood glue, screws, paint | 1-2 hrs | Beginner |
| Floating shelves | Shelf boards, concealed brackets, anchors | 2-3 hrs | Beginner to moderate |
| Crate shadow box | Wooden crate, sandpaper, paint, bracket | 1-2 hrs | Beginner |
| Shallow gallery shelf | Shallow board, L-brackets, anchors | 1 hr | Beginner |
| Ledge styling refresh | Existing shelf, art, objects | 30-45 min | Beginner |
A few practical notes. Pre-cut boards at the hardware store save you from buying a saw. Sample-size paint pots cover a single shelf easily. And scrapbook paper makes a cheap, changeable backing for a crate shadow box, so you can restyle the background without repainting.
Time estimates assume one person with basic tools. Add a helper and most of these drop by a third.
Where Shelf Art Meets the Rest of the Room
The projects above get art onto your walls. What they can't do is tell you which pieces belong there. That's where the rest of the room comes in: a resin accent on a ledge should echo a color already in the space, and a small sculpture needs enough negative space around it to read as deliberate.
Our curated collection includes abstract sculptures, resin accents, and functional lighting. If you're furnishing a first place and worried about pieces clashing, start with one sculptural accent and one textural element, then build outward from there.
Frequently Asked Questions
How do you display art on a shelf without it sliding off?
Use a picture ledge with a raised front lip, which holds frames at a slight backward lean and stops them from tipping. On a flat shelf, add museum putty or adhesive mounting squares under each frame corner. Keep frames back from the shelf edge, and avoid stacking tall frames in front of short ones. A shallow shelf 3 to 4 inches deep is enough for most frames up to 11 by 14 inches.
What is the best shelf depth for displaying framed art?
A shallow shelf between 3 and 5 inches deep works for most framed prints and picture ledge decor ideas. Standard frames up to 11 by 14 inches usually sit comfortably on a 4-inch ledge. Deeper shelves, around 8 to 10 inches, suit layered arrangements with books and small sculptures behind the art. Measure your largest frame's base before you cut any boards.
How do you arrange art and objects on a shelf?
Start with the largest piece off-center, then layer smaller frames in front and to one side. Group objects in odd numbers and vary heights so the eye moves across the shelf. Mix framed art prints with books, a plant, and one meaningful object. Leave about a third of the shelf empty so the arrangement breathes. Repeat one color or texture across the shelf to tie everything together.
Can beginners install DIY floating shelves without studs?
Yes, but only with the right anchors rated for your wall type. Drywall needs toggle bolts or heavy-duty self-drilling anchors, while plaster and brick require masonry anchors. Check the anchor's stated weight rating and stay well under it. For heavy shelves or valuable art, drive at least one screw into a stud. A stud finder costs under $30 and takes the guesswork out of placement.
How much does a beginner shelf art display project cost?
Most beginner projects land between $20 and $60 in materials. A three-board DIY picture ledge typically costs $25 to $40 for pine boards, brackets, screws, and paint. Crate shelves run $15 to $30 if you repurpose a crate you already own. Floating shelves with concealed brackets cost more, usually $40 to $80, because the hardware is the main expense. Prices vary by lumber yard and region.
Your walls are probably still bare, and the shelf you keep meaning to build is still a stack of boards in your head. Pick the easiest project on this list, the picture ledge, and build it this weekend. When you're ready for the pieces that go on it, browse our abstract sculptures and resin accents, or explore our wall-mounted shelving to skip the build entirely. Get started with Your Decor Essentials and turn one blank wall into a display you'll actually want to rearrange.